Spring Baking Vanilla Bean Cake
Highlighted under: Bakeshop Favorites
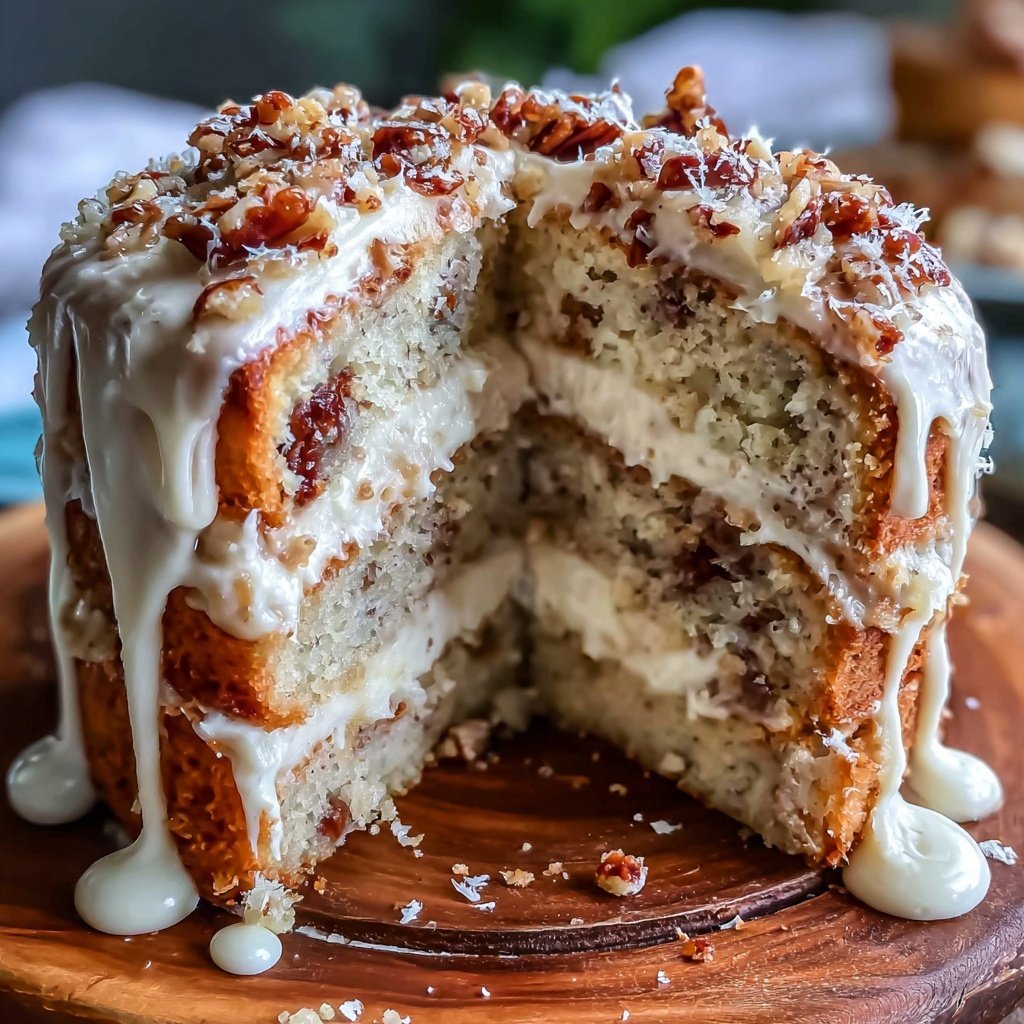
I’m always excited about spring baking, and this Vanilla Bean Cake has become a staple in my kitchen. The delicate flavor of real vanilla beans mixed with the fluffy texture makes this cake feel light yet indulgent. It showcases the freshness of the season, and I love serving it at gatherings or with afternoon tea. This cake not only tastes divine but also fills my home with an incredible aroma while baking. I can’t wait for you to try it!
Baking this Vanilla Bean Cake reminds me of sunny mornings in spring, surrounded by blooming flowers and eager guests. I took my time selecting the finest vanilla beans, and it truly made a difference in flavor. The secret to achieving a lush cake lies in creaming the butter and sugar until it’s light and fluffy, which incorporates air and ensures a tender crumb. After trying multiple recipes, this method has yielded the best results for me.
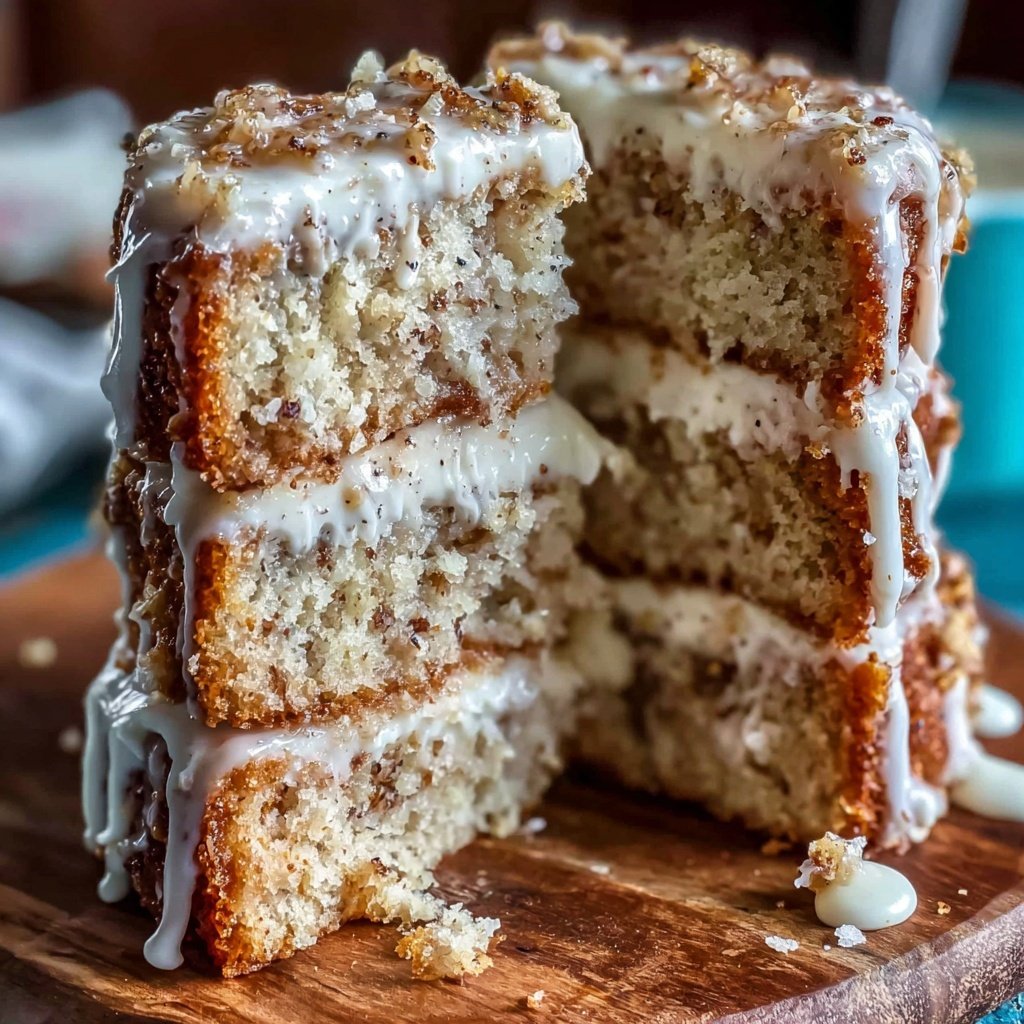
One of my favorite tips is to let the cake cool completely before frosting it; this prevents the frosting from melting and sliding off. I usually make this cake ahead of time, and it tastes even better the next day! Pair it with fresh berries or a light whipped cream for an extra touch of elegance.
Why You'll Love This Recipe
- Rich vanilla flavor with real vanilla beans
- Light and fluffy texture that melts in your mouth
- Perfect for spring celebrations or casual gatherings
Elevating Your Vanilla Bean Cake
Using real vanilla beans enhances the flavor profile of this cake significantly. The tiny black specks from the vanilla beans not only add visual appeal but also impart a deeper, more complex sweetness than vanilla extract. If you can’t find vanilla bean paste, you can use scraped vanilla beans from a pod instead, though the paste is more convenient as it integrates more easily into the batter. A little goes a long way, so don’t overdo it.
To ensure a light and fluffy texture, it’s crucial to cream the butter and sugar until they are pale and fluffy. This process incorporates air into the mixture, which helps the cake rise. You’ll know it’s ready when the mixture is noticeably lighter in color and has a creamy consistency. Avoid over-mixing after adding the dry ingredients to prevent a dense cake; mix just until you no longer see flour.
Finishing Touches with Frosting
When preparing the frosting, make sure your butter is at room temperature for easy blending. Beat until it becomes creamy and smooth, and gradually add the powdered sugar. This gradual addition helps to avoid cloudiness and ensures a smoother frosting. For a vanilla boost, using a high-quality extract can elevate the final taste. If your frosting is too thick, add a teaspoon of milk at a time until you reach the desired spreading consistency.
If you want to get creative with your presentation, consider layering fresh berries in between the cake layers, not just on top. Raspberries, strawberries, or blueberries pair beautifully with the cake’s vanilla flavor. They also add a refreshing tartness that balances the sweetness of the frosting. Just make sure the berries are washed, dried, and cut if needed to avoid excess moisture from ruining the cake structure.
Ingredients
For the Cake
- 2 cups all-purpose flour
- 1 ½ cups granulated sugar
- ½ cup unsalted butter, softened
- 1 cup milk
- 3 large eggs
- 1 tablespoon baking powder
- 1 teaspoon vanilla bean paste
- ¼ teaspoon salt
For the Frosting
- 1 cup unsalted butter, softened
- 4 cups powdered sugar
- 2 tablespoons milk
- 1 teaspoon vanilla extract
- Optional: fresh berries for garnish
Instructions
Steps to Make the Cake
Prepare the Oven
Preheat your oven to 350°F (175°C) and grease two 9-inch round cake pans.
Combine Dry Ingredients
In a separate bowl, whisk together flour, baking powder, and salt.
Cream Butter and Sugar
In a mixing bowl, cream the softened butter and granulated sugar until light and fluffy.
Add Eggs and Vanilla
Add the eggs one at a time, mixing well after each addition, then stir in the vanilla bean paste.
Mix in Dry Ingredients
Gradually add the dry ingredients to the wet mixture, alternating with milk, and mix until just combined.
Bake the Cake
Divide the batter evenly between the prepared cake pans and bake for 30 minutes, or until a toothpick inserted in the center comes out clean.
Cool and Frost
Allow the cakes to cool in the pans for 10 minutes, then turn them out onto wire racks to cool completely before frosting.
Prepare the Frosting
In a mixing bowl, beat the softened butter until creamy, then gradually add powdered sugar and mix in milk and vanilla extract until fluffy.
Frost the Cake
Spread the frosting evenly on top of one cake layer, place the second layer on top, and frost the top and sides of the cake. Garnish with fresh berries if desired.
Enjoy Your Cake!
Pro Tips
- Make sure your butter is at room temperature for easy creaming. Also, use a high-quality vanilla bean paste for an authentic flavor that elevates this cake.
Storage and Make-Ahead Tips
This vanilla bean cake is great for make-ahead baking. You can prepare the cake layers up to two days in advance. Bake the cakes, cool them completely, wrap them tightly in plastic wrap, and store them at room temperature. When ready to frost, simply unwrap and proceed with your frosting. This not only saves time but can enhance the flavor as the cake rests and develops.
If you have any leftover cake, store it in an airtight container at room temperature for up to three days. For longer storage, slice the cake and freeze layers; wrap them well to prevent freezer burn. When you’re ready to enjoy, thaw in the refrigerator overnight and frost as desired. This cake is perfect even after being frozen, maintaining its moist texture and delicious flavor.
Common Pitfalls and Troubleshooting
One common issue when baking cakes is inadequate rising. Ensure your baking powder is fresh; it should bubble when mixed with wet ingredients. If your cake comes out dense and heavy, it may be due to over-mixing when incorporating the dry ingredients or under-creaming the butter and sugar initially. Always follow the mixing instructions carefully, and if in doubt, err on the side of under-mixing.
If you find your cake is domed or uneven, it’s a good idea to level it with a serrated knife before frosting. This not only enhances the aesthetics but also ensures each slice is uniform and beautiful. For a perfectly smooth frosting application, use an offset spatula and start from the center of the cake, spreading outward.
Questions About Recipes
→ Can I use vanilla extract instead of vanilla bean paste?
Yes, you can substitute vanilla extract, but the flavor profile will be slightly different.
→ How can I store leftover cake?
Store the cake in an airtight container at room temperature for up to three days, or refrigerate for up to a week.
→ Can I freeze this cake?
Absolutely! Wrap the cooled cake layers tightly in plastic wrap and place them in the freezer for up to three months.
→ What can I add to the frosting for flavor variations?
You can add citrus zest, cocoa powder, or flavored extracts to customize the frosting to your taste.
Spring Baking Vanilla Bean Cake
Created by: Georgia Lane
Recipe Type: Bakeshop Favorites
Skill Level: Intermediate
Final Quantity: 12 servings
What You'll Need
For the Cake
- 2 cups all-purpose flour
- 1 ½ cups granulated sugar
- ½ cup unsalted butter, softened
- 1 cup milk
- 3 large eggs
- 1 tablespoon baking powder
- 1 teaspoon vanilla bean paste
- ¼ teaspoon salt
For the Frosting
- 1 cup unsalted butter, softened
- 4 cups powdered sugar
- 2 tablespoons milk
- 1 teaspoon vanilla extract
- Optional: fresh berries for garnish
How-To Steps
Preheat your oven to 350°F (175°C) and grease two 9-inch round cake pans.
In a separate bowl, whisk together flour, baking powder, and salt.
In a mixing bowl, cream the softened butter and granulated sugar until light and fluffy.
Add the eggs one at a time, mixing well after each addition, then stir in the vanilla bean paste.
Gradually add the dry ingredients to the wet mixture, alternating with milk, and mix until just combined.
Divide the batter evenly between the prepared cake pans and bake for 30 minutes, or until a toothpick inserted in the center comes out clean.
Allow the cakes to cool in the pans for 10 minutes, then turn them out onto wire racks to cool completely before frosting.
In a mixing bowl, beat the softened butter until creamy, then gradually add powdered sugar and mix in milk and vanilla extract until fluffy.
Spread the frosting evenly on top of one cake layer, place the second layer on top, and frost the top and sides of the cake. Garnish with fresh berries if desired.
Extra Tips
- Make sure your butter is at room temperature for easy creaming. Also, use a high-quality vanilla bean paste for an authentic flavor that elevates this cake.
Nutritional Breakdown (Per Serving)
- Calories: 320 kcal
- Total Fat: 20g
- Saturated Fat: 12g
- Cholesterol: 75mg
- Sodium: 120mg
- Total Carbohydrates: 35g
- Dietary Fiber: 1g
- Sugars: 28g
- Protein: 3g